Nothing beats making something yourself. The sense of accomplishment alone is rewarding enough. The time and effort you put into a creative project is worth it because not only have you created something with your own hands but you have also developed your skills. Every minute you spend on your hobby you are improving and honing your skills.
Being creative and enjoying your hobbies has a positive effect on our mental health. It lowers stress and increases feelings of self worth and self confidence.
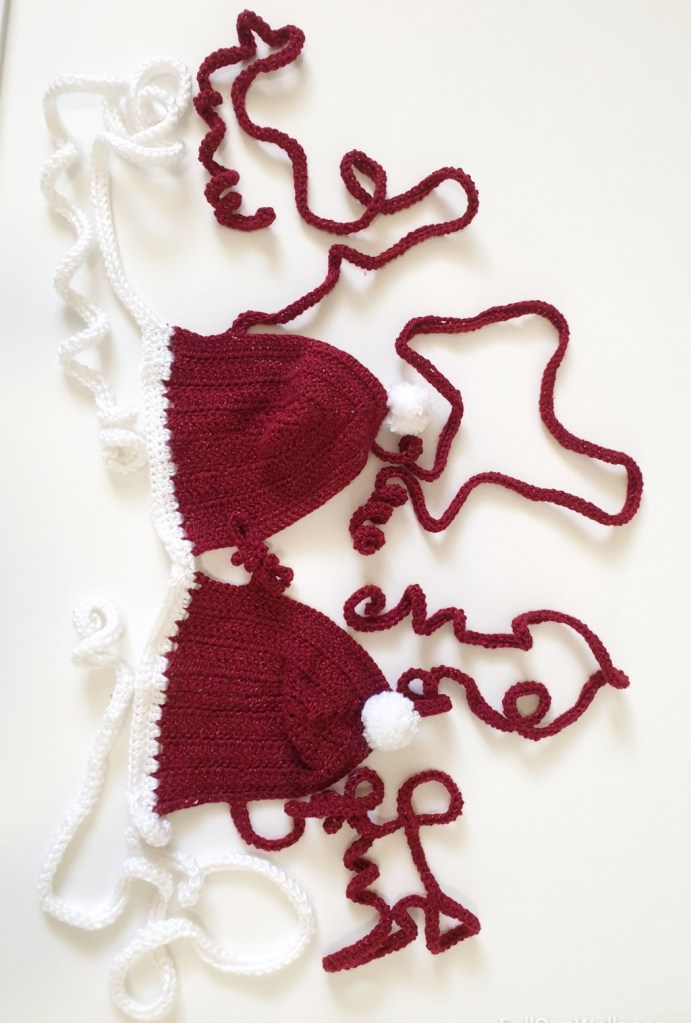
I’d love to share with you this project I recently completed. For those of you who don’t know I have a passion for crochet. I tried a new crochet pattern and I modified it slightly to create this super adorable Santa Hat bralette.
I made this bralette top in a size small but the straps are long enough to fit a medium too. The cups fit a C-D. Feel free to send me a message to order a custom crocheted bikini top, or something else that you might need. I also have a passion for making weighted therapy items so reach out to me if you are interested in ordering a crocheted commission piece from me.
Please check out my online store with some of my crochet creations. My repertoire ranges from small stuffed toys to large ottomans. Bikinis are relatively quick to crochet but cardigans are slow going, just to give you an idea.
Thank you so much for your support. You can find me on Instagram and YouTube by searching for me, Queeenvk.
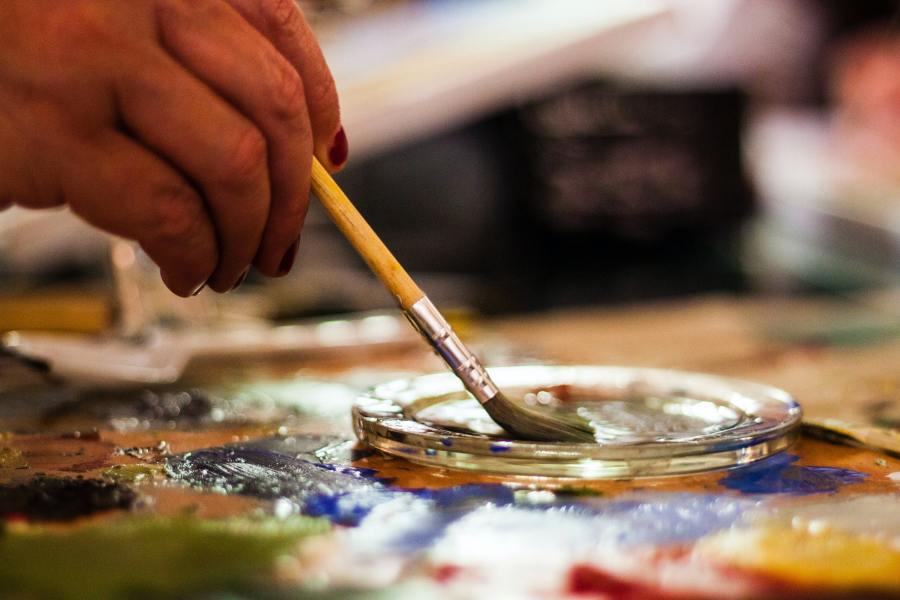
How good is it to just sit back for a relaxing crafternoon (crafting in the afternoon)? It feels so rewarding when we finish a project and stand back to admire our handiwork, so it is no surprise to hear that there are emotional and neurological benefits of learning a new skill and letting your creativity loose.
Scientific research shows that crafting lowers stress and can help reduce feelings of anxiety. Levels of the stress-hormone cortisol decreases during and after performing creative craft activities.
While you’re crafting you are connecting to the present world around you instead of being stuck in the worries of the past or future. Your brain power is taken up by something far more productive and useful for your health. Some people use art as a therapeutic or meditative process to clear and calm the mind.
Inventing new ideas and exploring old ones in a different way can be so rewarding. It brings on those feelings of self accomplishment as well as expanding your mind to see new perspectives.
You’ve probably heard that doing crossword puzzles staves off dementia by helping keep the brain active. Basically, when you don’t use it – you lose it, so if you’re making new connections in your brain you’re keeping it active. Whether your hobby is crossword puzzles or creating a new piece of art, you are keeping those neural connections in working order.
There are many different types of crafts that are available for you to try. Find one that resonates with you and practice it, letting your mind flow with creativity.
My favourite craft at the moment is crochet. It took me a bit of practice, but once I got the hang of it, it just clicked for me. The repeating movements are quite soothing, as long as you take breaks to rest your hands! Here are some of my previous posts related to crochet crafts.
Here is a list of some other crafts you might like to try, maybe there are some you’ve always wanted to try or maybe you will find something new that you never considered before:
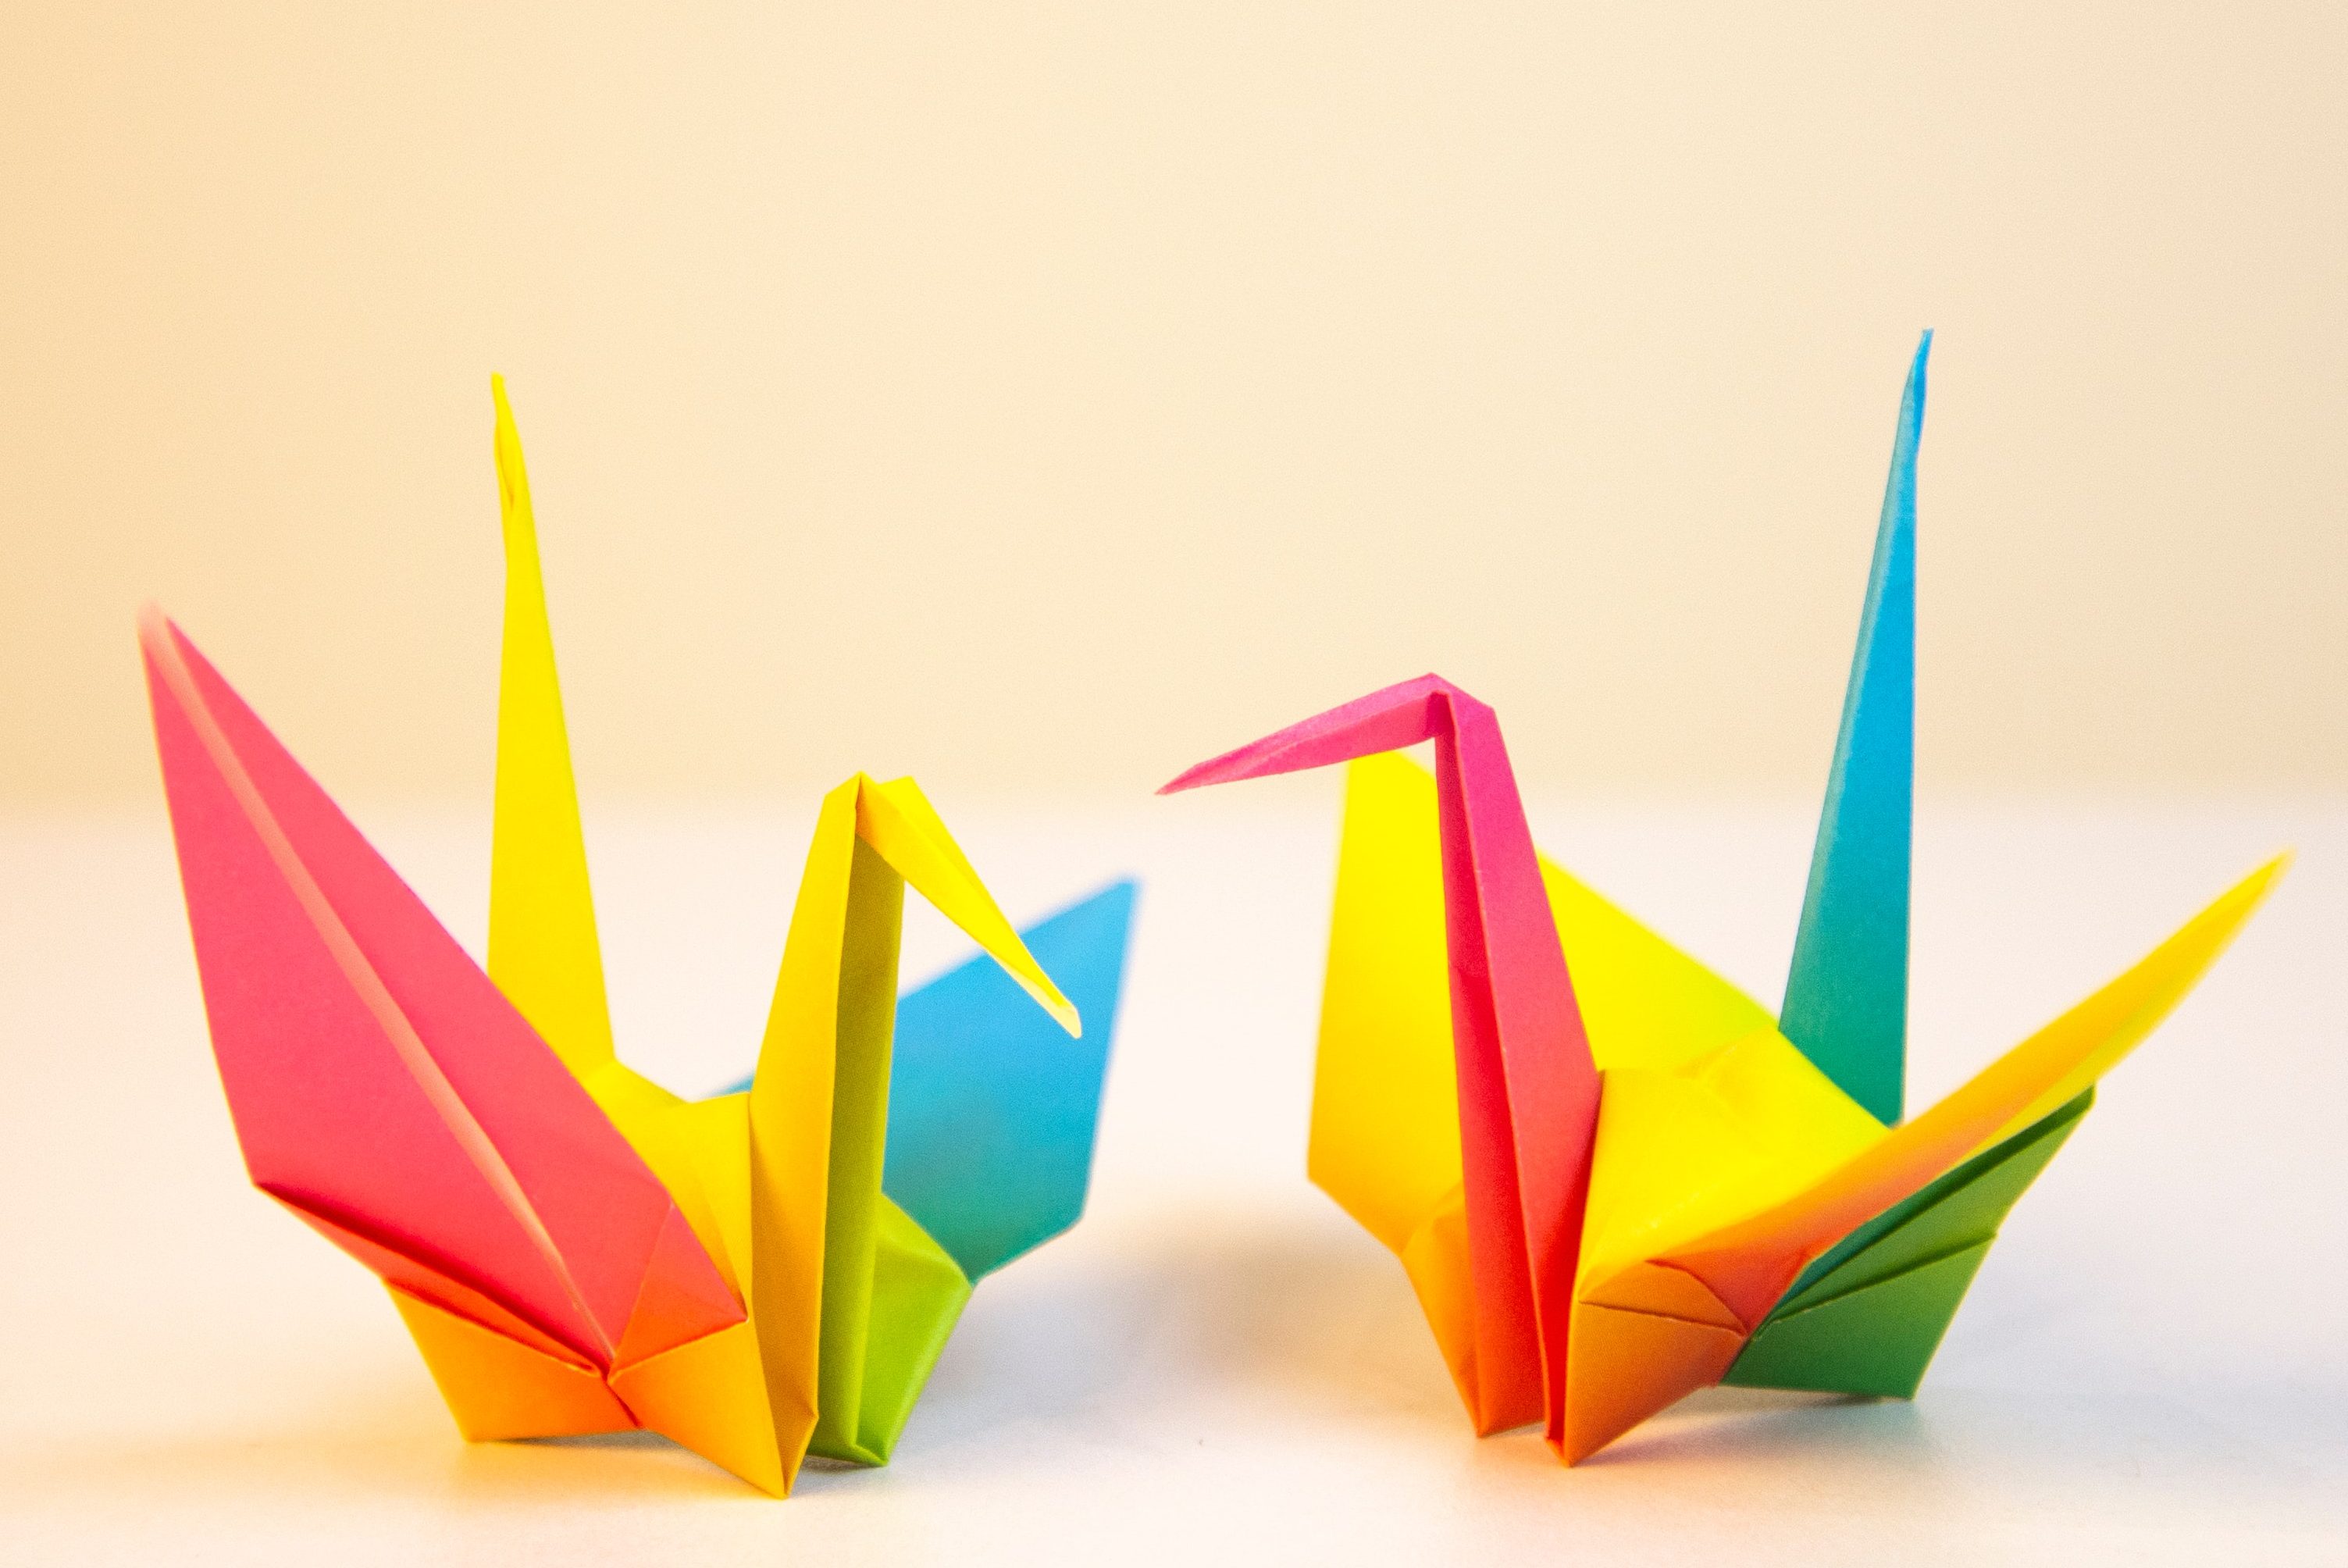
Origami/paper art
Painting
Sewing/needlework
Yarn crafts such as knitting, macrame, etc.
Scrapbooking
Lettering/calligraphy
Clay sculpting/pottery
Resin pouring
Flower pressing or flower arranging
Origami cranes
Reply in the comments with the crafts you love and the crafts that you’ve always wanted to try. Which crafts interest you and which crafts have you tried but didn’t like? For me, I’ve tried sewing and embroidery but they are too complex and confusing for me to grasp, whereas crochet clicked in my brain and I understand it a lot easier. Isn’t neurology so fascinating?!
Please visit and subscribe to my YouTube Channel for more from me, QueeenVk. ❤
The weighted blanket craze has been opening up the conversation around mental health and anxiety. People of all different backgrounds and neurotypes are experiencing the benefits of weighted therapy items. Therapy toys can be used by people of all ages as they can help anyone who is experiencing difficulty with coping day to day.
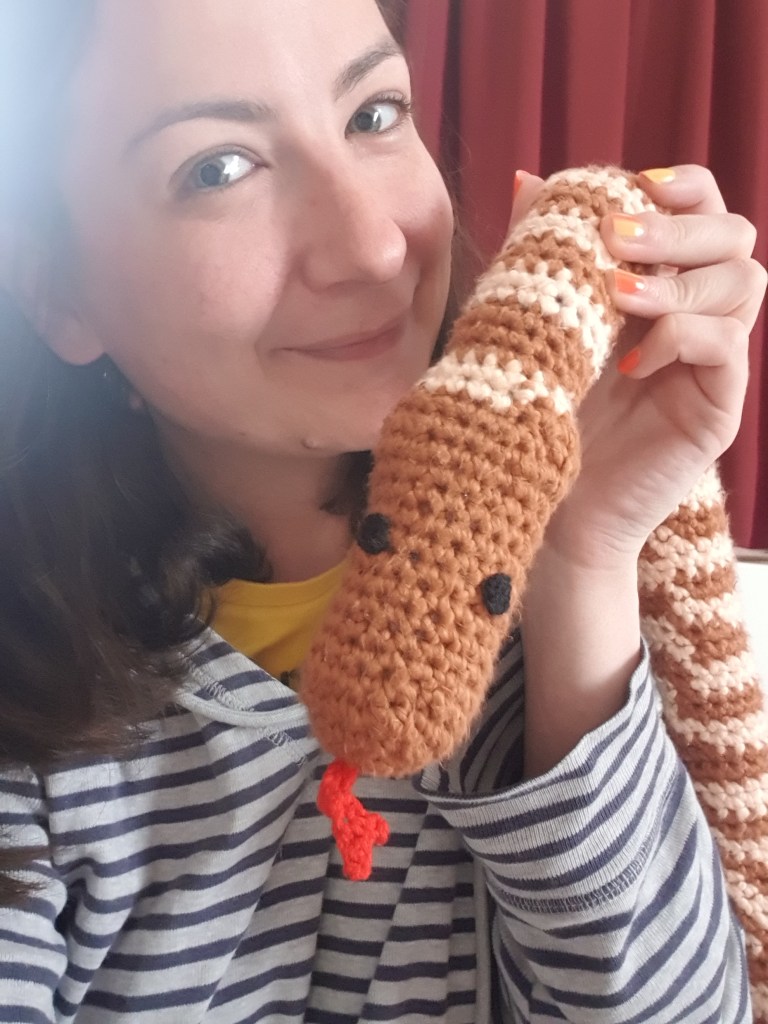
Me having a doona day, in my lounge wear snuggling the woma python I designed and crocheted.
I combined my passion of crochet with my desire to help people and make people smile to come up with a few cute weighted plushie designs. The featured image at the top of the post is the cute crocheted weight crocodile I created.
Me getting cuddles from the crocheted weighted crocodile plushies I designed and made.
There is a lack of colourful and lovable lap pads and weighted blankets out there. These therapy items can be so enjoyable and soothing. So I decided to design a lap pad with stimming bits to preoccupy your hands while watching TV.
A progress shot of my stimming lap pad while I was sewing the seams up. It’s a sky and sea theme with (clockwise from top left) 2 clouds, a sun, sea anemone, star fish and a bubble.
I filled the centre of the lap pad with foam so it has structure while it sits on your lap.
You can email me at fullcupwellness1@gmail.com to order your custom crocheted therapy items. All ideas are welcome. Let’s get creative together.
See my crochet creations that are up for sale here (including the weighted crocodiles!)
Check out my YouTube channel for more The Full Cup Wellness with me, Queeenvk
Now that we have learned the mindful skill of crochet we can make our own custom items. You can get creative and design your own clothes, toys, household items, art… imagine all of the possibilities.
Imagine a waste-free home…
Or at least a reduced waste home. A home without plastic in the cleaning cupboard! All of the microfibre cleaning cloths and sponges you have used to clean your home have been creating plastic waste and contributing to landfil. Thankfully there are so many amazing alternatives that are even more effective at cleaning. It’s so easy to make the switch to something better for you and the environment.
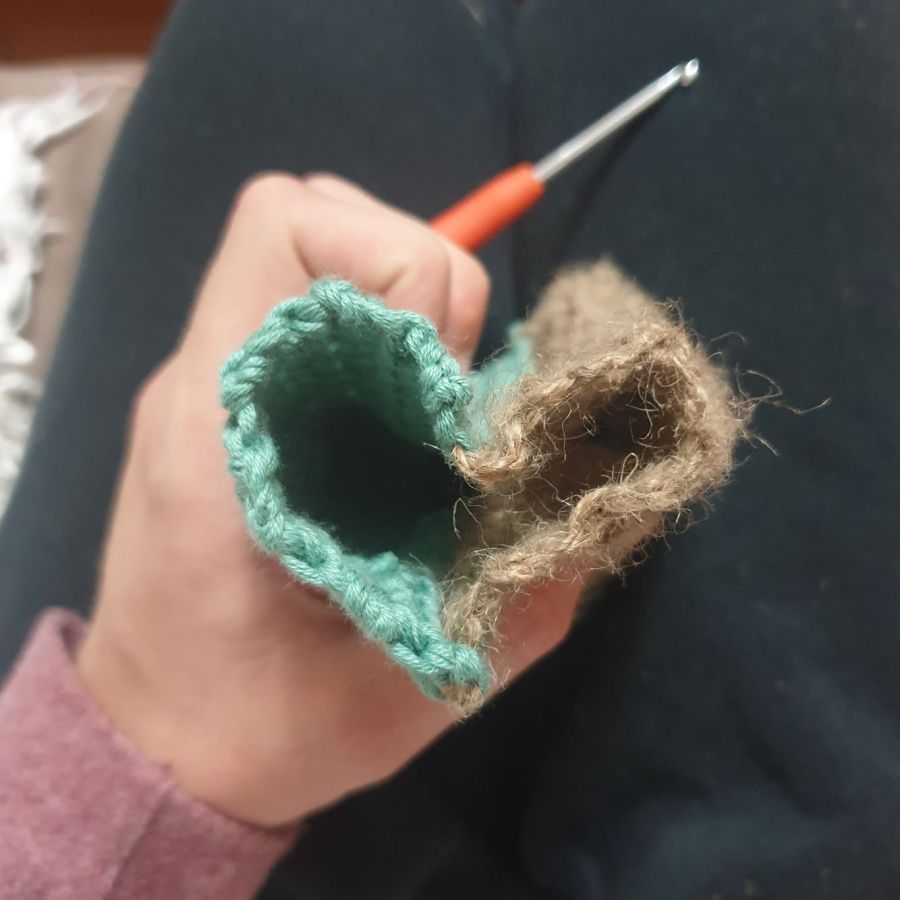
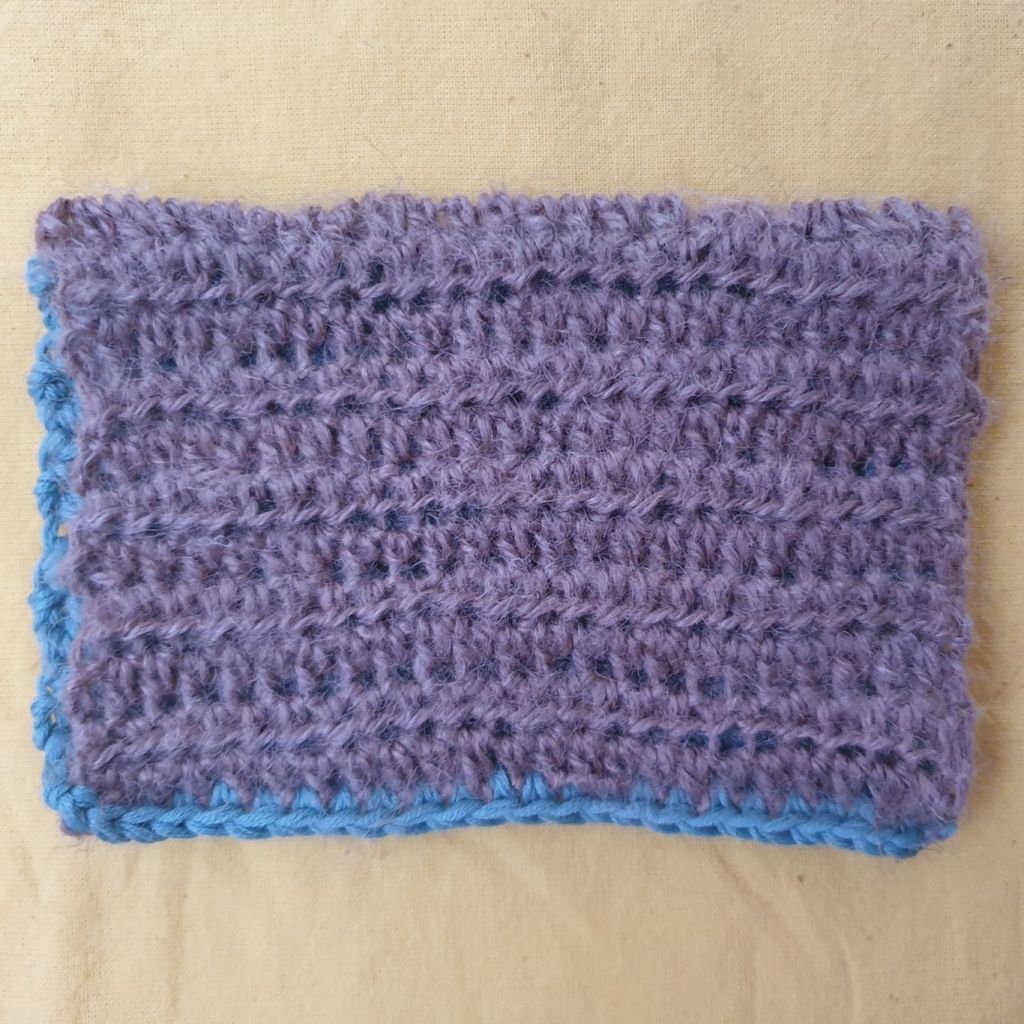
Just remember when you’re buying yarn for crochet and knitting, all of the synthetic fibres out there are creating microplastics that enter our environment and our bodies. I like to stick to cotton and hemp yarn when I’m making items for cleaning. I designed this scrubber sponge pattern so that one side is made from hemp yarn for extra scouring power and the other side is made of cotton for regular wiping and scrubbing.
I’ve called this deisgn a multipurpose scrubber sponge because it’s useful for cleaning in any room of the house, not just the kitchen. Keep one of these in your bathroom and laundry too. You’ll be reaching for it to clean every surface in your home.
This is my first time writing a pattern for other people to use so please let me know if there are any mistakes!
Begin with a foundation chain and make the sponge as long as you like. You can keep adding rows to make the sponge wider. I found this size works best for my small lady hands but you might prefer an oversized style sponge.
Abbreviations:
Ch: Chain
Sc: Single crochet
Hdc: Half double crochet
Pattern:
With hemp yarn Ch 25
Row 1: Hdc in the 3rd chain from the hook. Hdc all the way along.
Rows 2 – 12: Ch 2 for the turning chain. Hdc to the end of the row.
Attach cotton yarn and cut off the hemp yarn.
Row 12: Sc along the long edge of the hemp rectangle.
Rows 13 – 24: Hdc to the end of the row. Don’t bind off yet!
Finishing: Still with your cotton sitting at the end of Row 24, fold the 2 halves of the sponge together and Sc along the other long edge to join the 2 halves. You will be crocheting into both of the stitches on each edge so they are now “sewn” together.
I leave the short sides open so that the air flows through the sponge for easy drying.
You can sew or crochet up the short sides if you desire.
Let me know in the comments if you try out this pattern. Tell us what you think!
You can purchase one of these scrubbers at my Storenvy store and check out my other crochet creations for sale.
There are different parts of the stitch in which we can work into. This causes the yarn to be pulled in different directions so you can shape your work into whatever design you design.
Working into the post
You can crochet a stitch around the front of a post of a crochet stitch. Or you can crochet around the back. When reading a crochet pattern these stitches are called Front Post and Back Post crochet. Normally this term is abbreviated with the type of crochet stitch, for example, a double crochet stitch worked into the front of a post in a stitch is called FPDC. Similarly, we can have back post treble crochet written as BPTC.
Front Post Double Crochet (FPDC)
Working into the post of a previous row of double crochet (US terminology from here onwards) can be done around the front of the work. In the video below I show how to do a FPDC. My YouTube video explains in detail how to make this stitch.
Front Post Double Crochet
You make a FPDC by putting your crochet hook through the post of the next stitch from the front of the work.
Back Post Double Crochet (BPDC)
Working from the back of the work you can make a stitch around the back of a double crochet post. Or a treble crochet post! In the video below I have done a BPDC. My YouTube video explains how to do it too.
Back Post Double Crochet
Insert your hook from the back of the work, through the DC post of the next stitch. Work the rest of the DC as normal.
Working into the front and back loops
Front loop only (FLO) and back loop only (BLO) stitches can create edges for your work to give it a 3D shape.
Front loop only (FLO)
The FLO and BLO stitches are super easy. Just work your next stitch into one of the loops at the top of your stitches. This can be done for any height stitch because you’re just using the top loops this time.
Back loop only (BLO)
Increases and decreases
Your rows and circles don’t need to stay the same size. To create shapes with your yarn and crochet hook you’ll need to learn to increase and decrease the number of stitches in your rows and rounds. Increases in a crochet pattern are abbreviated as sc inc for adding a single crochet stitch to a row. The stitch type is usually included otherwise it’ll just say inc and you continue using the same stitch as the rest of the row.
Crochet patterns abbreviate decreases to Dec or Sc2tog which means single crochet two together. Or it’ll say DC or Tr depending on the stitch required in the pattern.
Single crochet decrease
To decrease the number of stitches in your row by 1 you will crochet 2 stitches together into 1. For a single crochet decrease: put your hook into the stitch and pull up a loop, don’t complete the stitch yet. Put your hook into the 2nd stitch along and pull up a loop, you’ll have 3 loops on your hook. Then finally pull up a loop through all 3 loops to complete the SC Dec.
Thanks so much for reading. Your support means everything to me. Sending my gratitude and kind thoughts to you all. ❤
Welcome, please sit down, get comfy and join me for some more mindful crafting. Today we’re continuing to learn the art of crocheting a circle.
In part 3 of the crochet for absolute beginners series we learned how to begin a circle with yarn and our crochet hook. Now we need to learn the mathematical formula for creating nice flat crochet circles. If you have too many or too little stitches in each round you’ll end up with wonky bumpy circles that don’t sit flat.
The blue circle on the left has too many stitches in the round and is going bubbly. The red circle on the right has too few stitches and is becoming a bowl.
The mathematical formula to the perfectly flat crochet circle goes a little something like this:
For example, we begin with 6 stitches in round 1.
In round 2 we will need to increase in every stitch around. You now have 12 stitches.
In round 3 increase every 2nd stitch. Now you have 18 stitches.
Round 4 increase every 3rd stitch. 24 stitches will be in the 4th round.
Every round will increase 6 times so you will add 6 stitches in each round. If you begin with 8 stitches you’ll increase 8 times each round. That’s the mathematical pattern here.
Tips for keeping the right number of stitches
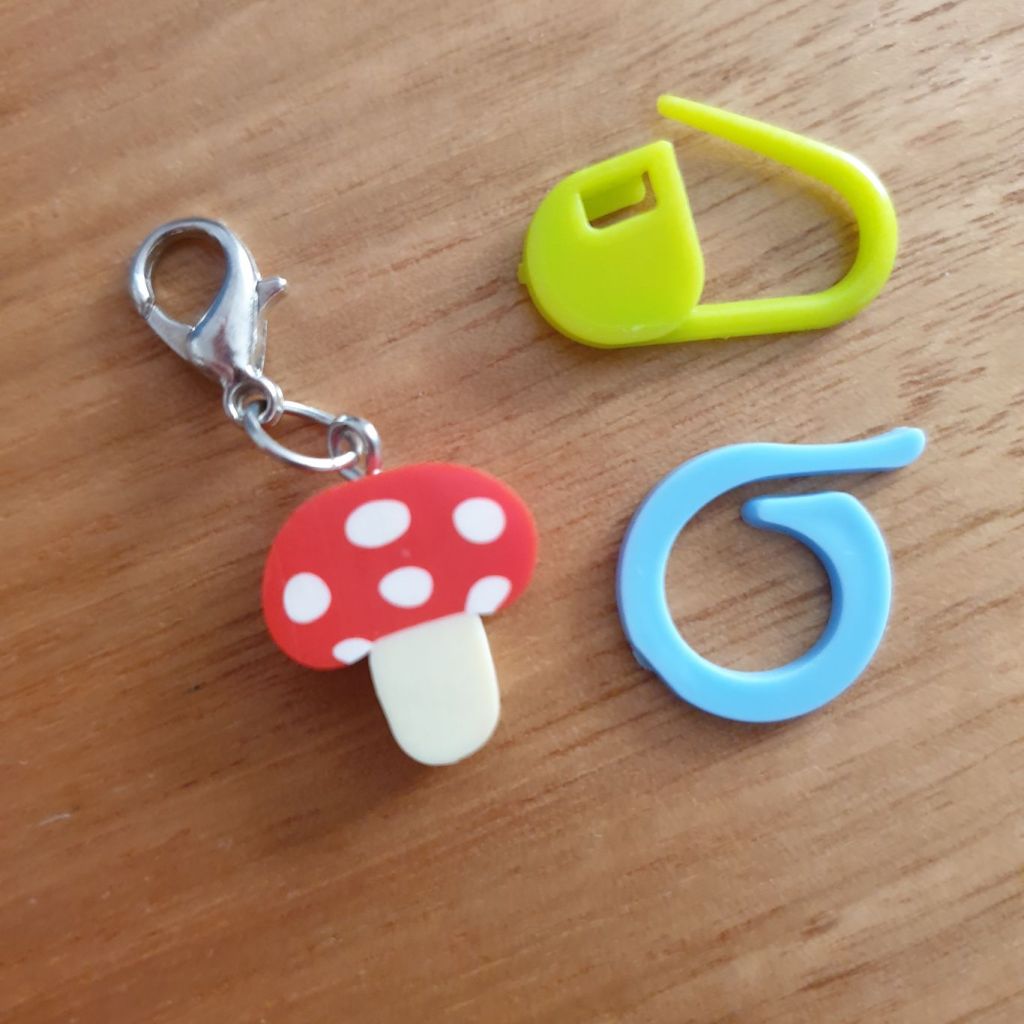
• Use a stitch marker to mark the first stitch in every round. Otherwise you’ll be constantly counting as you work and the chance of miscounting the stitches is too great! Trust me.
Types of stitch markers. You can also use a short piece of yarn that is a different colour to your work.
• Count your stitches at the end of each round unless you’re absolutely confident you did it correctly. Otherwise your subsequent rounds will all be off. You will notice your circle becoming more bumpy and wonky as you continue.
Thanks for reading my tutorial! It would mean so much to me if you could please show your support by subscribing to my YouTube channel.
Continuing on our journey to learn a new skill and practise mindfulness at the same time; it’s part 3 of the crochet tutorial series, how to crochet in a circle. Instead of crocheting rows as we previously learned in parts 1 and 2, we are now going to crochet in rounds.
See the video version of this tutorial at my YouTube channel.
Why would you need to know how to crochet in circles?
By learning how to crochet in the round you’ll be able to make circular baskets, amigurumi (crocheted toys), hats, beanies, round pillows etc etc etc. There are many crochet patterns that you will encounter which involve crocheting in the round instead of in rows.
Some crochet toys (amigurumi) I made this week. Each section of this pattern is crocheted in the round. Pattern by @Amiguruku
There are two methods to begin a crochet circle.
Method 1: Chain circle
I call this the chain circle method because you make the circle by joining the 2 ends of a row of chain stitches together. Let me show you how.
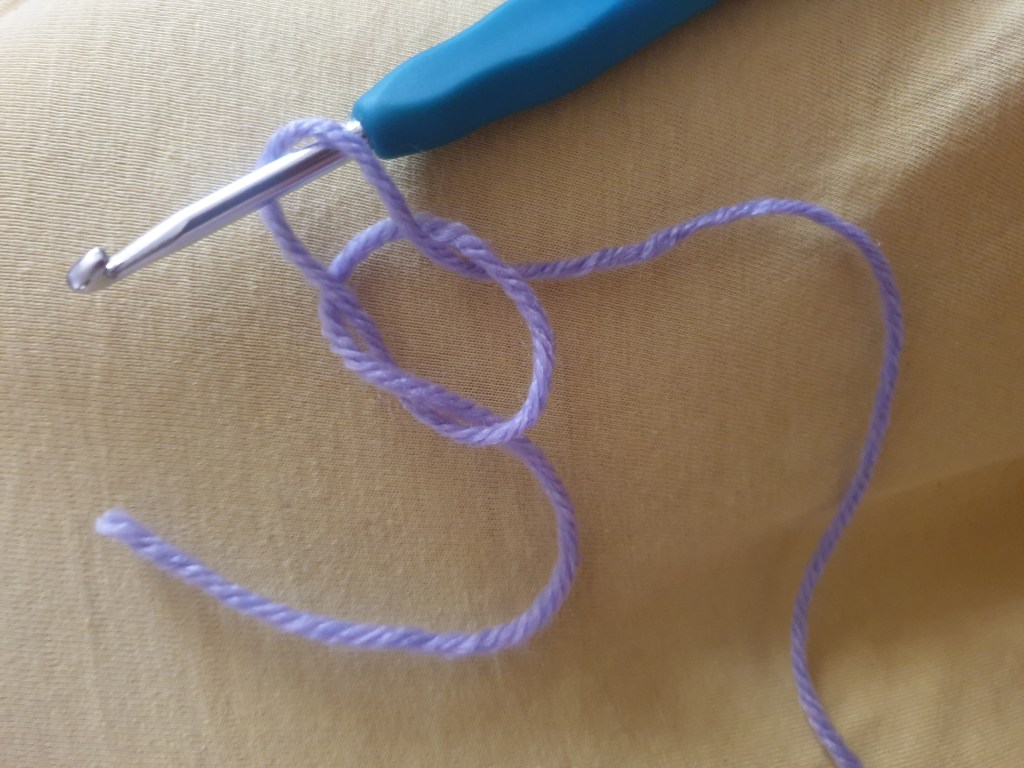
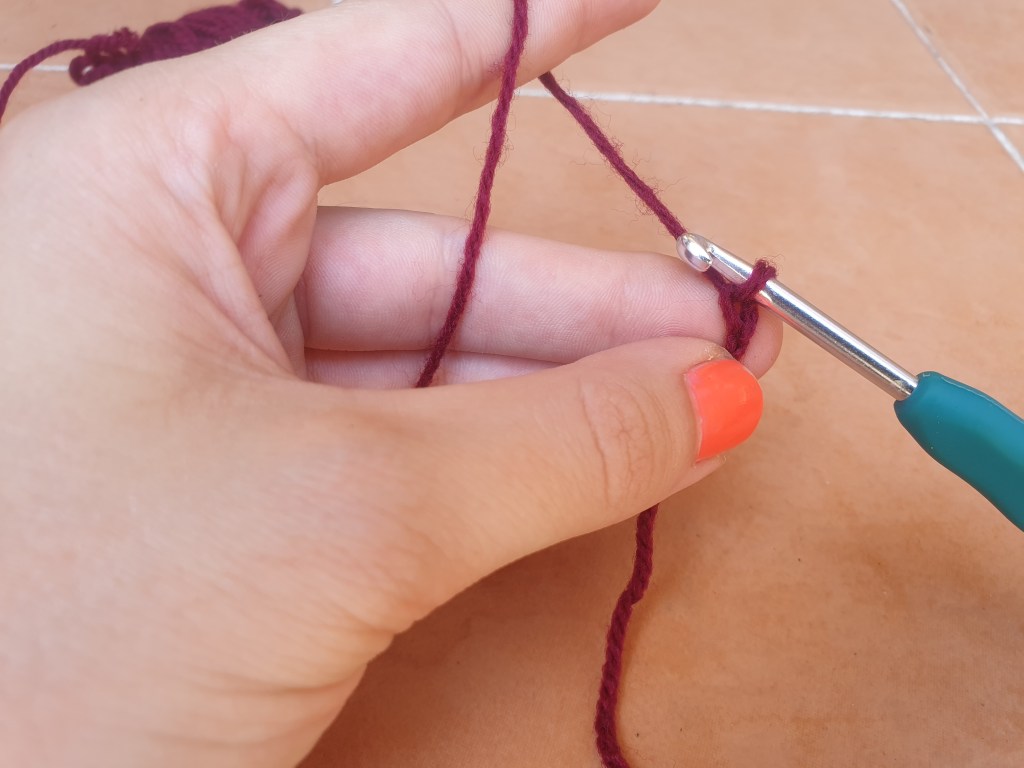
Begin with a slip knot on your crochet hook. Remember: this doesn’t count as a stitch.
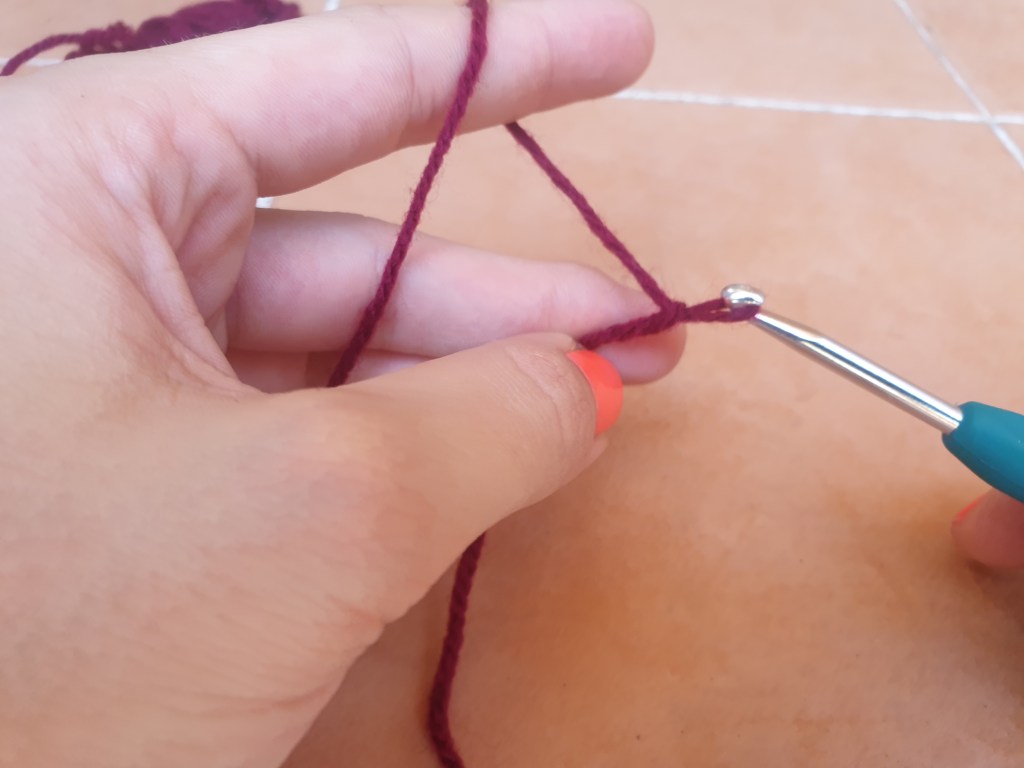
The pattern you are working from will tell you how many stitches to use to make the circle, unless it uses method 2 below. If you’re not using a pattern you can decide how many chain stitches you want to use depending on how many stitches need to fit in the circle. Let’s say you need 6 single crochet stitches to fit in your little chain circle. I would chain 3 then join the circle with a slip stitch in the first chain, see image below.
Three chain stitches joined to the first chain stitch with a slip stitch.
Then you can crochet into the circle you made. I put six single crochet (US terminology) stitches into my chain circle, see image below. I haven’t joined this round with a slip stitch. The pattern that you’re working from will state whether the rounds are joined with a slip stitch or not. If they are not joined rounds then you get a spiral instead of concentric circles.
Six single crochet stitches in a chain circle.
Tip: As a beginner, I sometimes mistake the initial slip knot as a stitch but we need to remember not to crochet into this loop! Join your circle in the first chain stitch and you can definitely see which is the first chain by using a stitch marker. Examples of stitch markers that I have are in the picture below. You can also use a short piece of yarn that is a different colour to your work in the stitch you want to mark.
Examples of stitch markers
New stitch alert
I mentioned the slip stitch in the previous section but I haven’t yet shown you how to do it! The slip stitch is the shortest stitch you can make, it’s even shorter than a single crochet stitch. You do the stitch by entering the next stitch, yarn round front of the hook as normal, then pull the yarn all the way through all of the loops on the stitch. Done!
Method 2: Magic circle
Begin by almost making a slip knot. What I mean is that you leave the knot loose instead of pulling the yarn close to the hook. See the picture below for reference.
A loose slip knot to begin the magic circle.
Now you seal the magic circle by making one chain stitch. See the picture below!
Magic circle plus one chain stitch to seal the circle.
The stitches that are going into the magic circle are called “round one” of the project. If you need to do single crochet (sc) stitches (US terminology) in round 1 then you only need one chain stitch to begin your work. This is because one sc is the height of one chain stitch. Follow the rules for the number of chains you need for a turning chain as mentioned in part 2 of the crochet for absolute beginners tutorial series.
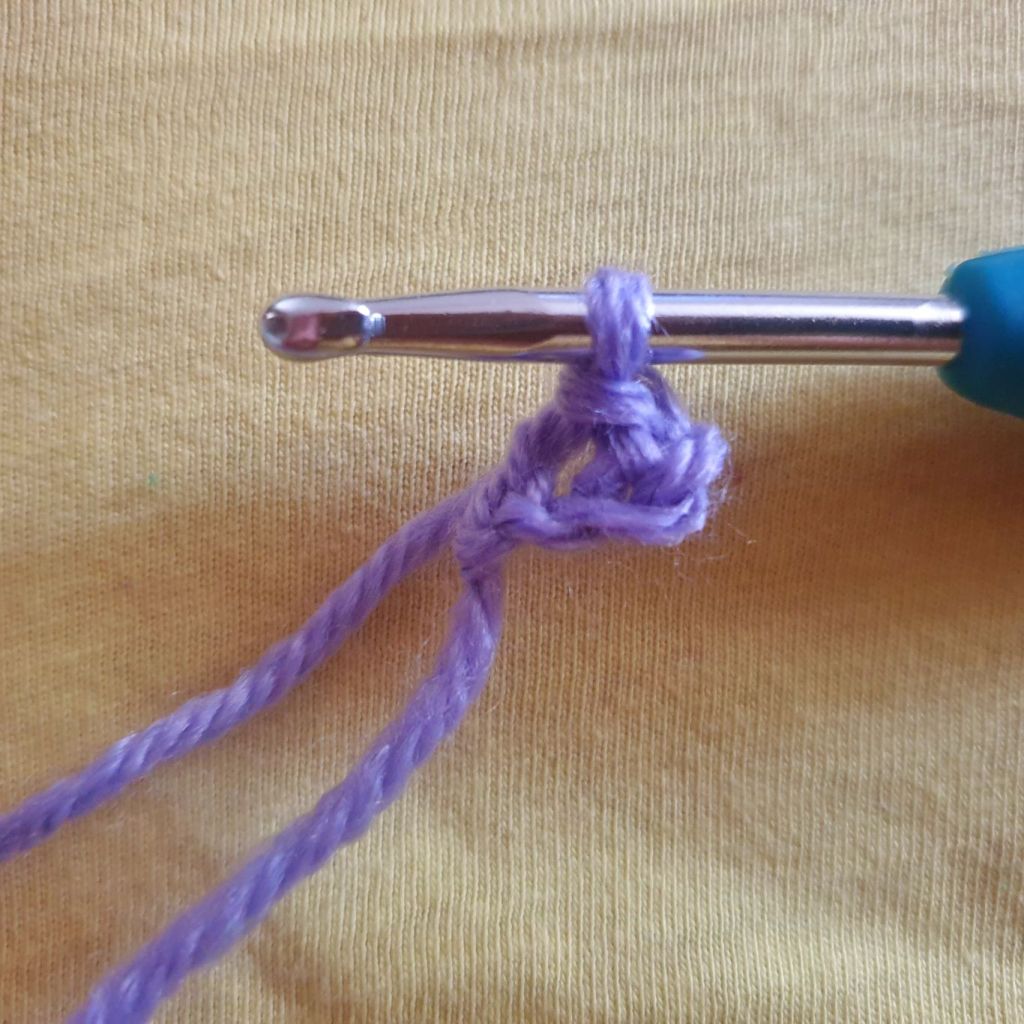
Now you’re going to crochet round 1. In the example below I’ve made 6 sc in the magic circle. The first chain doesn’t count as a stitch in this case.
6 sc in a magic circle.
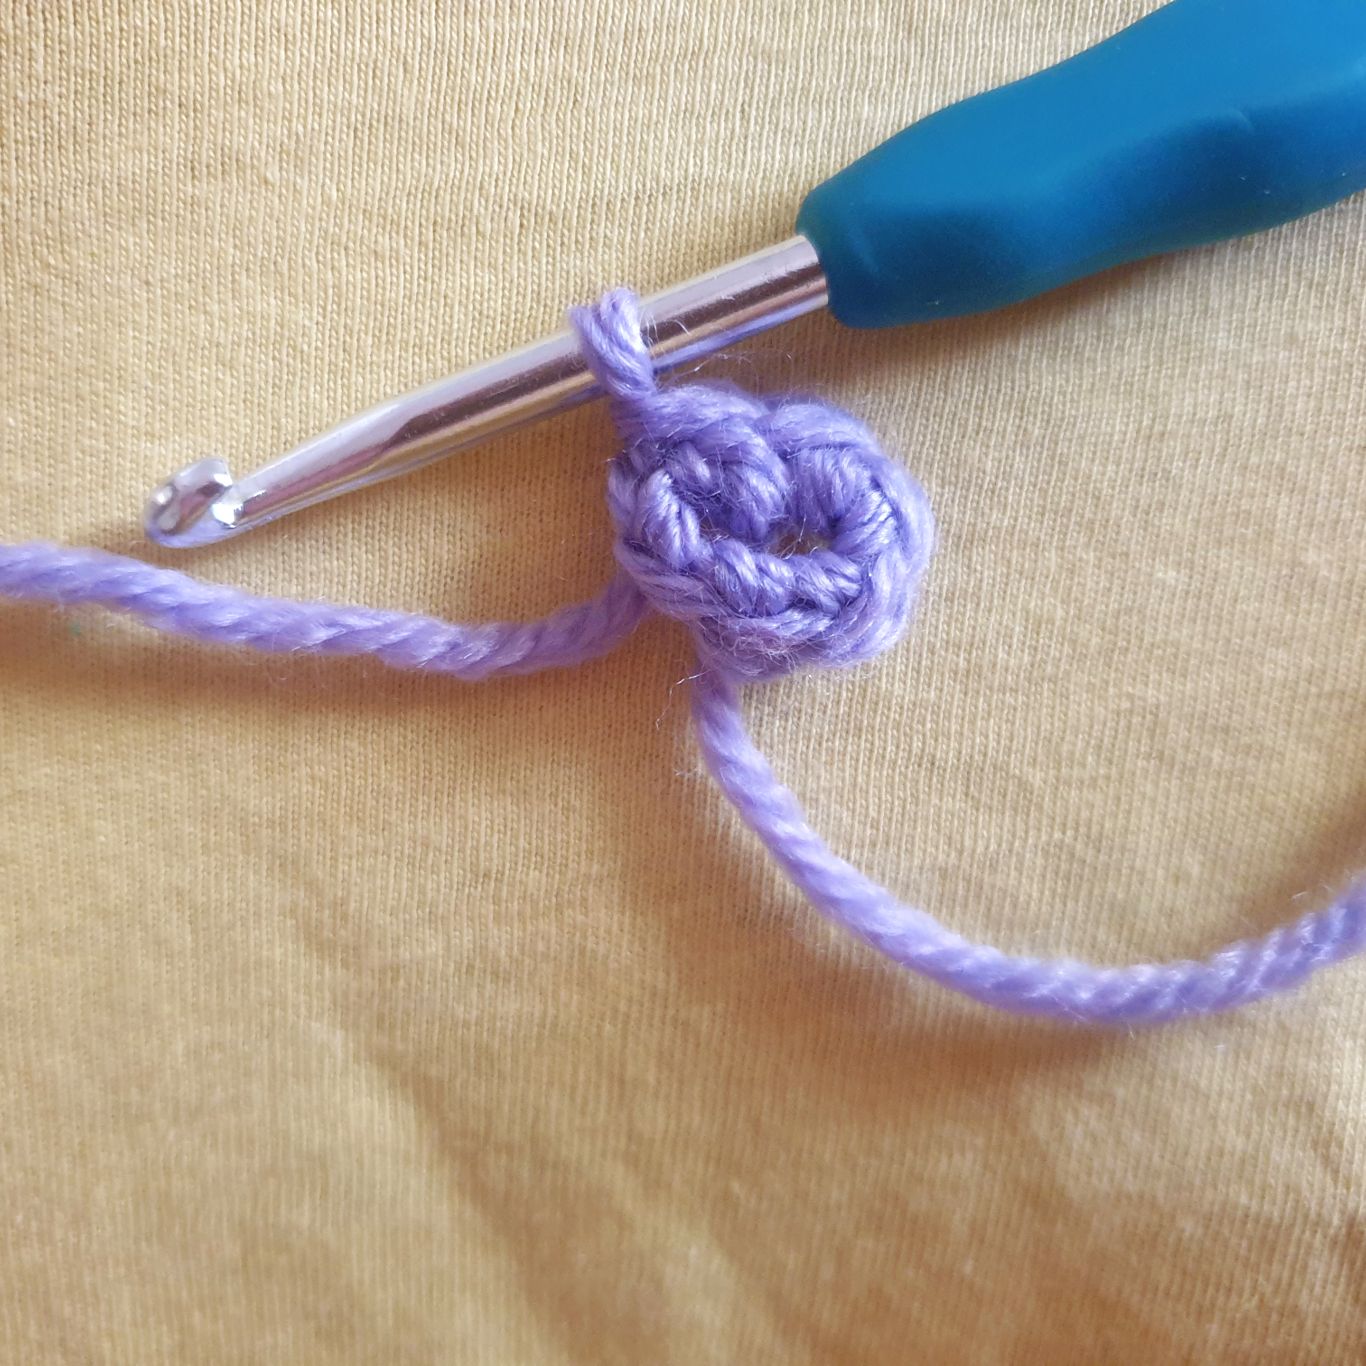
Here’s the part where it becomes a MAGIC circle. Pull the trailing end of the yarn tail until the circle is drawn tight.
Magic circle with 6 sc pulled tight.
Now you can join the circle together with a slip stitch, unless the pattern says not to join the rounds. Below is a picture of the circle joined with a slip stitch.
Magic circle joined with a slip stitch in the first stitch of the round.
As you work around the circle the centre will become loose unless you secure the tail of the yarn. There are different ways to do it and I’m not quite perfect at it yet but I’m getting there! Here’s my method for securing that circle tightly: Once you’ve completed your work, or when you’re a little bit of the way through, pull the tail of the yarn as tight so that the magic circle is as small as you need it to be. Then use your crochet hook to weave the tail back and forth through the stitches around those first few rounds of the work.
When you want to make perfectly round circles you will need to pay attention to the the number of stitches you work into each round. If you have too many stitches the circles will become ruffled like a chip because all those extra stitches are trying to fit in a smaller space. If you don’t have enough stitches in the round then the work will become bowed and bowl-shaped as the stitches will pull to make the way around the circle.
There’s a mathematical formula to getting the right number of stitches in each round. I won’t go into it here in this post but stay tuned for more crochet tutorials.
Thanks so much for reading!
Visit my store on Storenvy to purchase some of my crochet creations. More items to be added very soon!
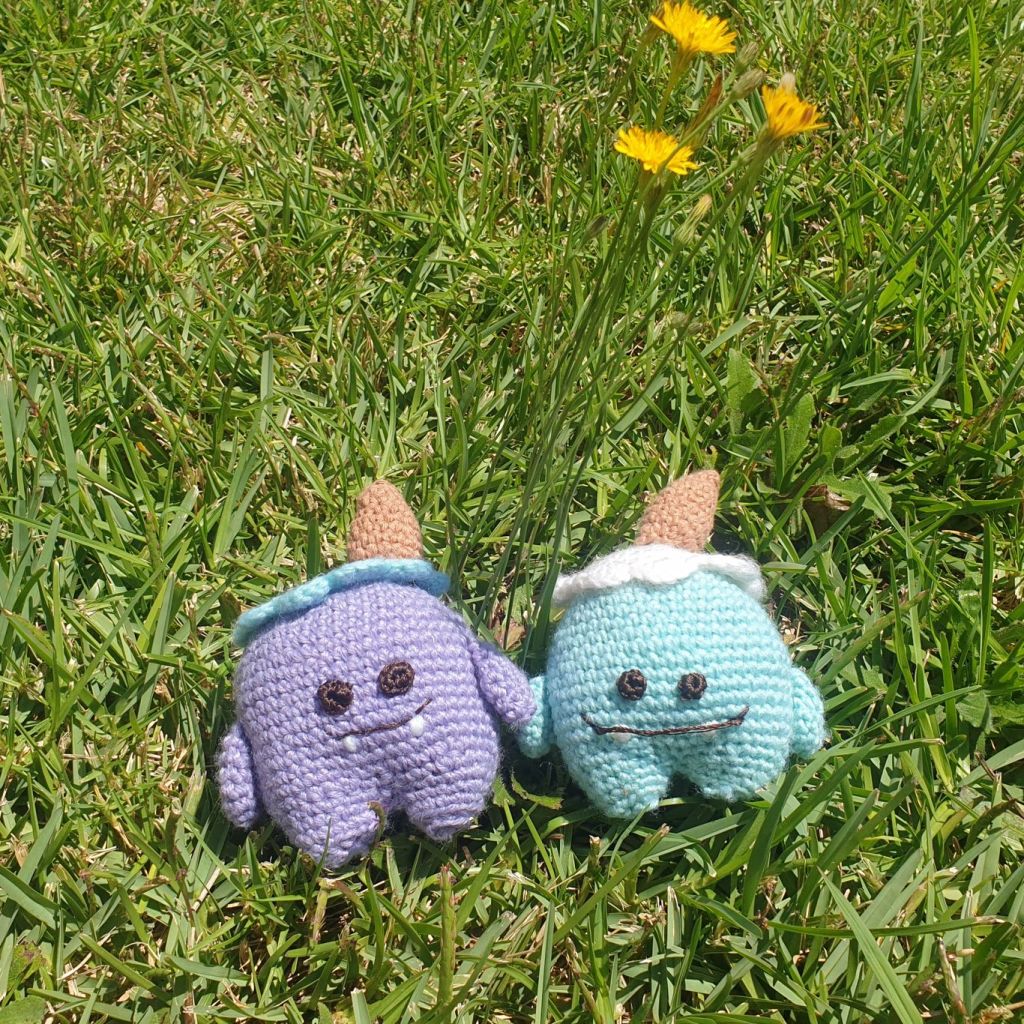
Comment below or email me to request custom coloured ice cream melt monsters. Each individual monster is AUD$25 not including shipping. Extra customisation is available for an additional cost.
Mint choc chip ice cream monster in purple and vanilla ice cream monster in mint. Contact me to request your custom colours. Each individual monster is AUD$25 not including shipping.
Welcome back for part 2 of crochet for absolute beginners. The video version of this tutorial is at my YouTube channel. I’ll be using US terminology in the main text. In brackets I will place the equivalent UK stitch translation next to each US stitch. In the previous part we made a foundation chain. You’re going to use that foundation chain now so have it ready.
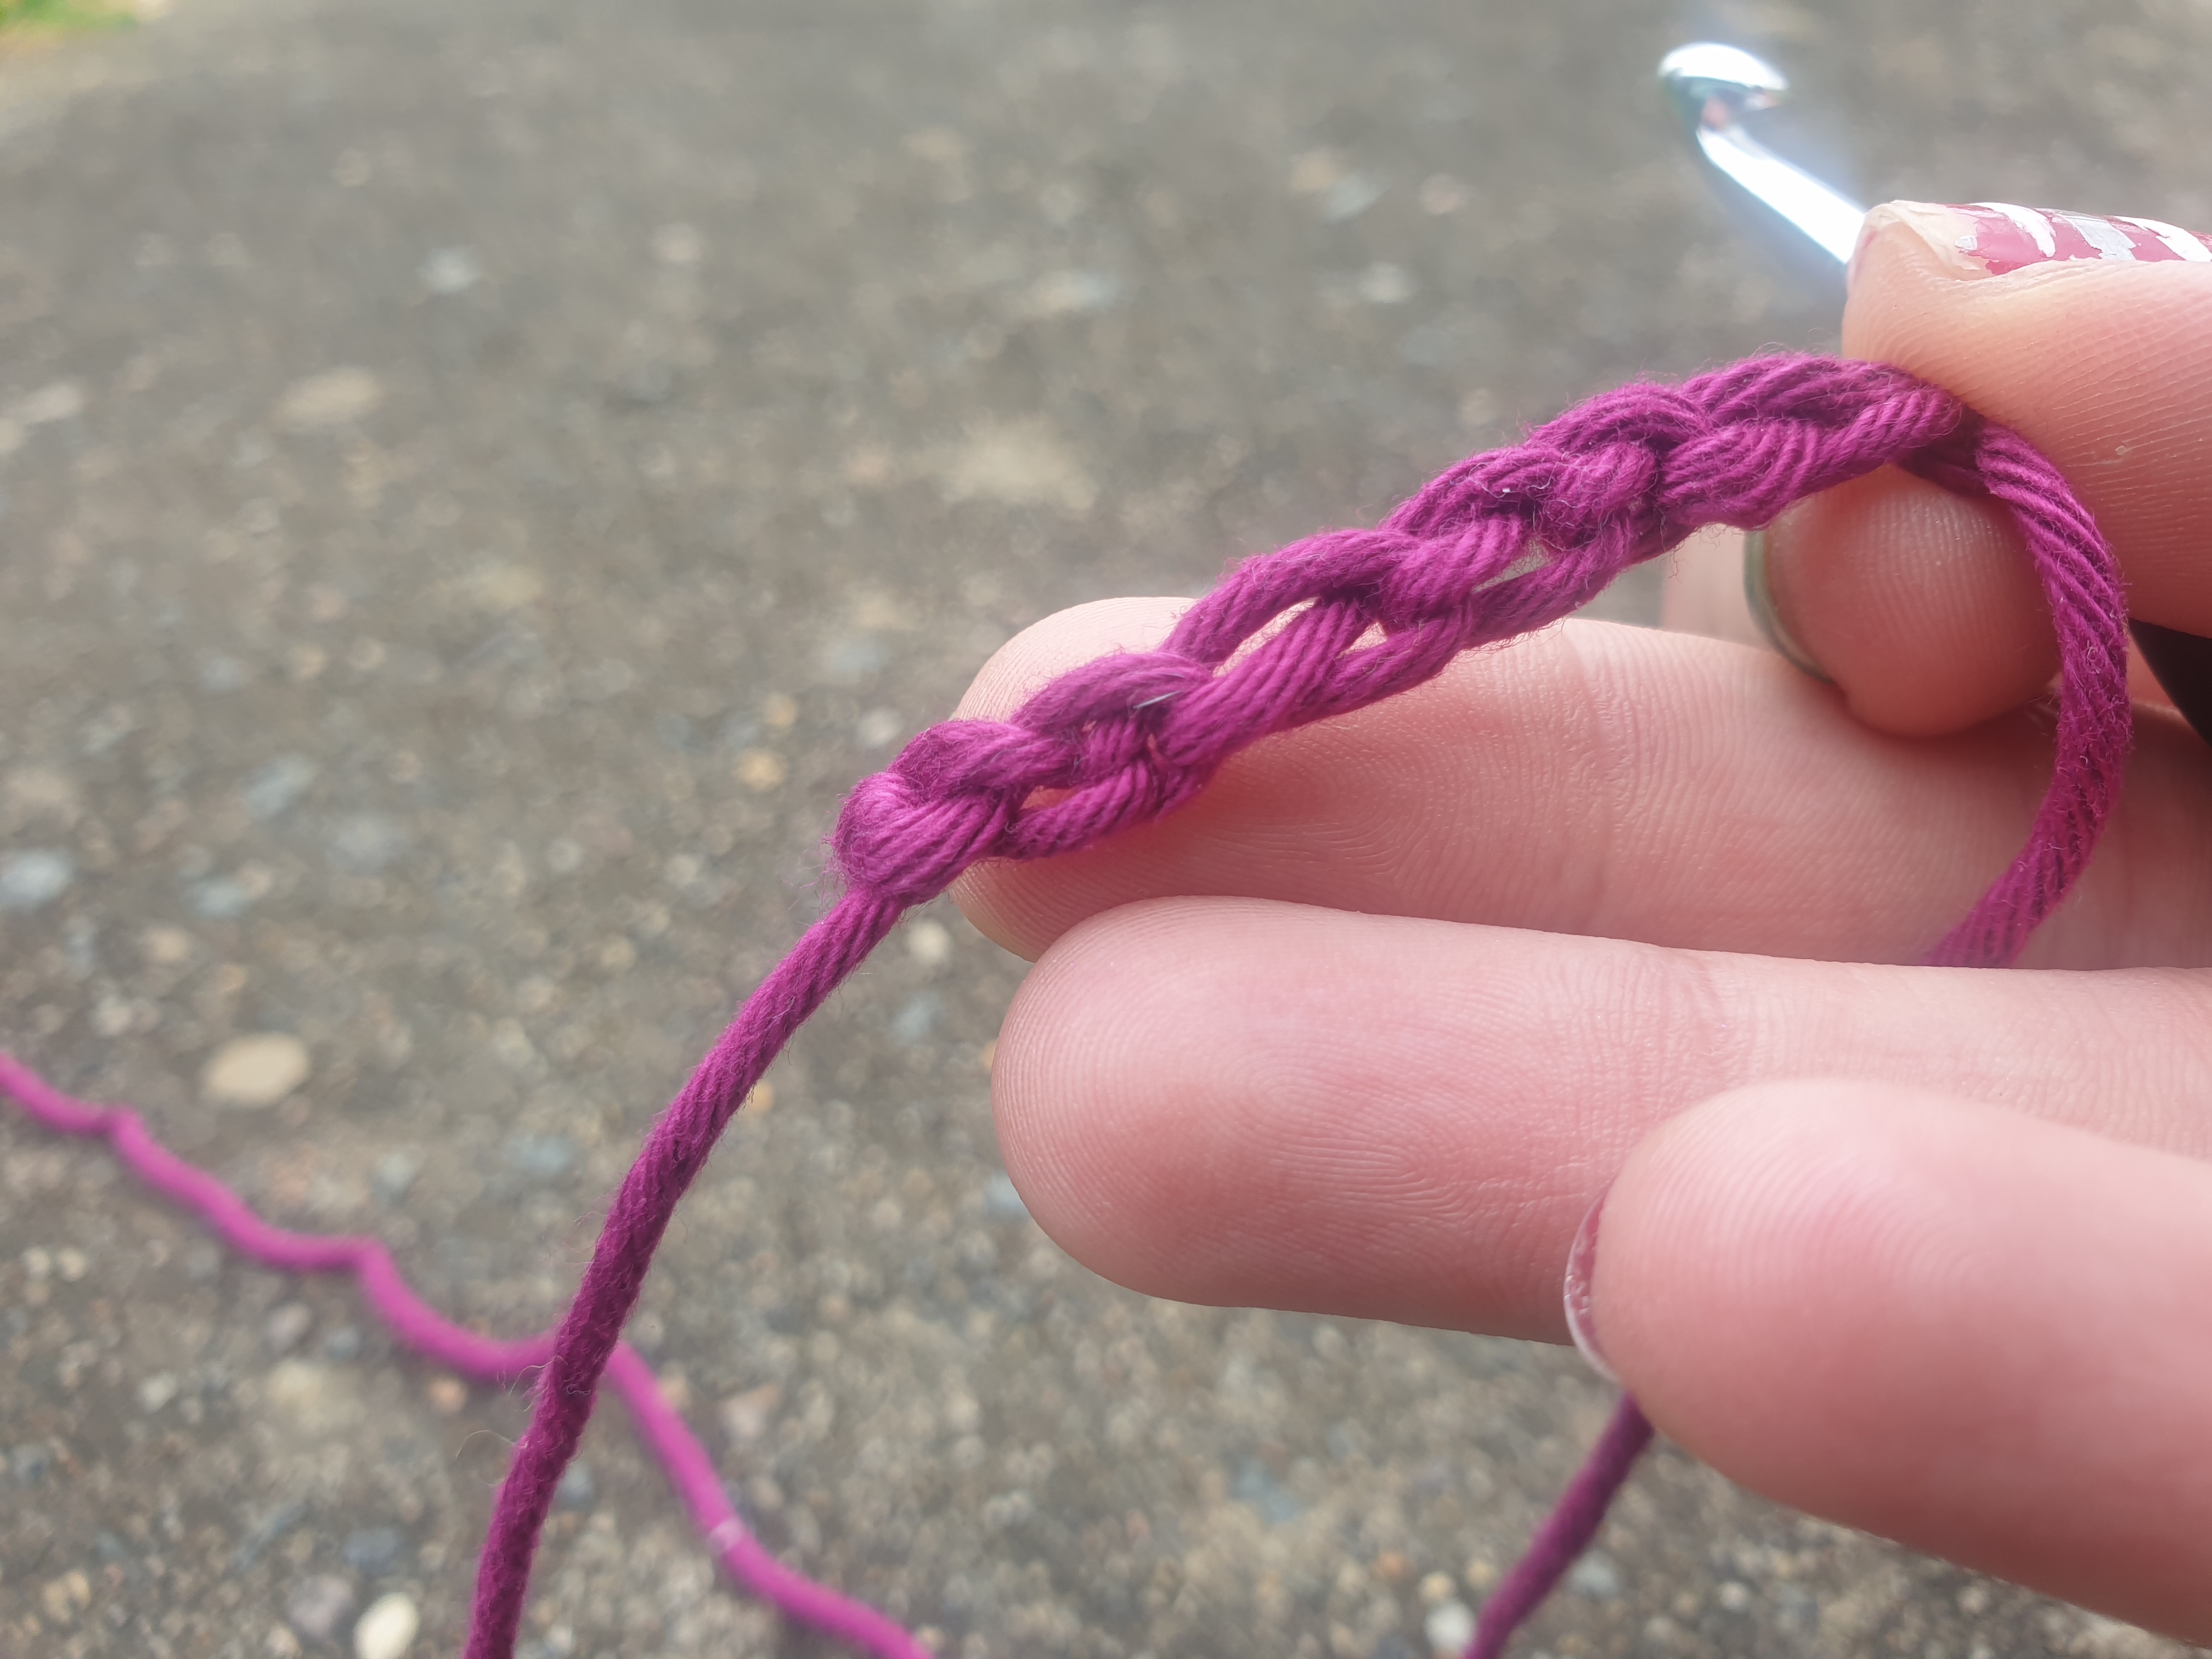
There are multiple parts of the chain you can work into to get a different effect along the beginning edge of your work. First we will identify the parts of the chain so that we know which part to use.
From the top view of the foundation chain you will see V-shaped stitches linked together. Each of the 2 strands of the v is a single chain stitch. Normally you will work into either 1 or both of these strands. I prefer to work along the top strand of the v.
Foundation chain top view. Find the V-shaped stitches. Excuse me for the chipped polish!Foundation chain bottom view. Find the back bumps of each chain stitch.
When viewing the base of those v-shaped stitches you’ll see a 3rd strand behind the 2 v strands. I call this the back bump of the chain. Sometimes it’s pulled a bit tight to see it but once you get an eye for it you will spot them in no time. It will take a bit of practice and playing around with the yarn before you can easily tell which strand is which. Don’t give up too early! Practise, practise, practise.
Depending on which type of stitch you will use along the chain there will be a particular number of “turning chains” you will need. This is because the height of each stitch is different. One single crochet stitch (double crochet in UK terms) is the height of one chain stitch so you will leave one “turning chain” on your foundation chain and between each row. A half double crochet (half treble crochet in UK) stitch is as tall as 2 chains so you will leave 2 chain stitches before working into the 3rd chain from the hook. Remember, the loop on the hook isn’t a stitch yet so it doesn’t count.
Working a single crochet (double crochet in UK) into the 2nd chain on the hook. Also working into the top loop of the foundation chain.
My preference is to work into the top loop of the foundation chain as this is easiest for me. Here’s a row of single crochet or sc (dc in the UK) worked into the top loop of a foundation chain, see next image below.
Single crochet (double crochet in UK) worked into the top loop of the foundation chain.
To make the sc (dc) stitch you begin by inserting the hook into the second chain on your hook. The loop on the hook doesn’t count as a stitch so don’t count from this loop. Next you “yarn round hook” (as shown in my YouTube videos part 1 and 2). Then pull that yarn through the first loop on the hook which is called “pulling up a loop”. Now you have 2 loops on your hook so next you “yarn round hook” and then pull the yarn through both loops. You’ve completed one sc. Well done!
Now what about crocheting into other parts of the chain? As I mentioned above, working into the back bump is more difficult but it’ll give an edge that has the V-shaped chain stitches pointing out. This technique makes a nice looking detail for crocheting straps and hems.
Working a sc (dc) into the back bump of the foundation chain.
In the next photo you’ll see a row of single crochet (dc) worked into the back bump of the foundation chain.
Row of sc (dc) worked into the back bump of the foundation chain stitches.
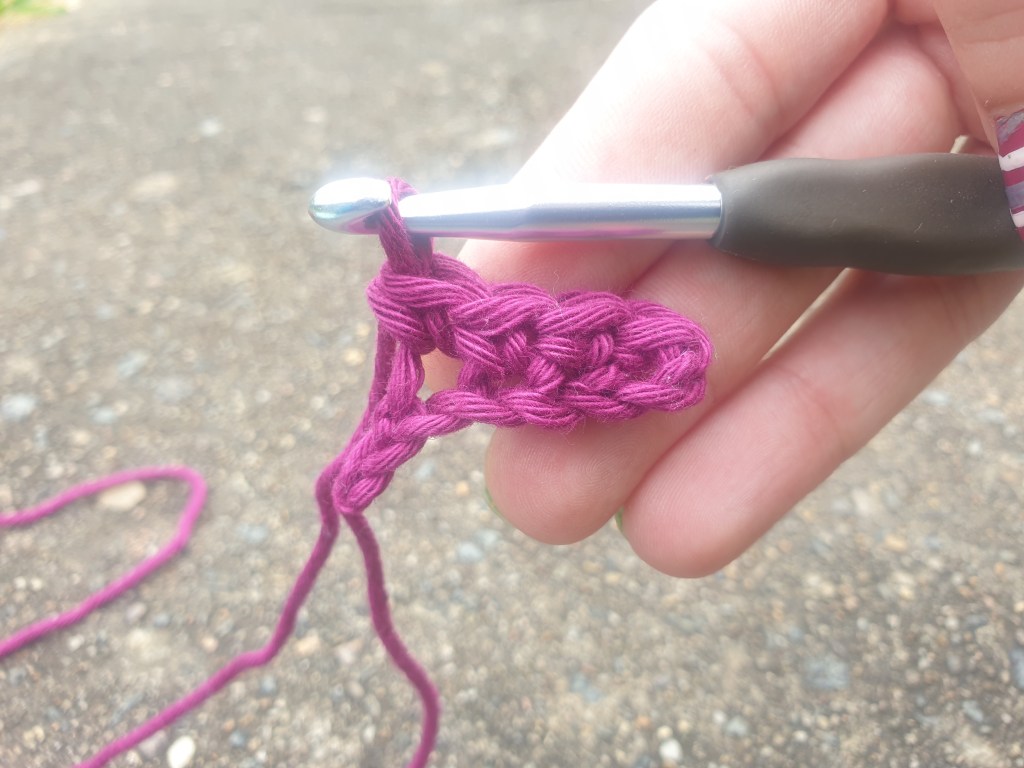
My personal favourite stitch is the half double crochet or hdc (half treble crochet or htr in the UK) because it works up so quickly and it looks like pretty little knots all in rows. The height of this stitch is between a sc (dc) and a dc (tr). You’ll need 2 turning chains to make a hdc (htr) so count 2 chains after the loop on the hook. Work into the 3rd chain from the hook.
Half double crochet (half treble crochet) stitches worked into the top loop of the foundation chain.
To make a hdc (htr) you need to “yarn round hook” before you place your hook in the stitch. Now the yarn is wrapped around the hook once, place the hook in the next stitch and yarn round hook. Now you pull up a loop through the first loop on the hook. You will have 3 loops sitting on the hook. Now yarn round hook and pull through all 3 loops. That’s one hdc (htr) complete. Excellent!
A double crochet (treble crochet) stitch needs 3 turning chains as well because it is about as tall as 3 chains. When making a new row with dc (tr) stitches you’ll make 3 chain stitches at the end of the row then turn your work and continue into the first stitch of the new row.
Double crochet (treble in the UK) stitches worked into the top loop of the foundation chain.
Before you put the hook into your work wrap the yarn around the hook once then go and put the hook into the next stitch. Yarn round hook, pull up a loop through the first loop on the hook. You have 3 loops on the hook. Yarn round hook, pull yarn through the first 2 loops on the hook. You have 2 loops left on the hook. Yarn round hook, pull the yarn through both loops. That’s the double crochet (treble crochet).
Treble crochet (known as double treble crochet in the UK) needs 4 turning chains and it is taller than a dc. You normally won’t encounter stitches taller than the tr (dtr) in the majority of the patterns you will see. So I’ll end with a picture of tr (dtr) stitches worked into a foundation chain.
Treble crochet (double treble in the UK) stitches worked into the top loop of the foundation chain.
For the tr (dtr) stitch you leave 4 chains then crochet into the 5th chain from the hook. Or if you’re at the start of a new row you will make 4 chains before working into the row. But before you go ahead and put the hook in the stitch you need to give the stitch height. More height than the previous double crochet (treble crochet) stitch.
Wrap the yarn around the hook twice and then insert the hook into the next stitch. Yarn round hook again and pull up a loop through the first loop on the hook. Now you have 4 loops on the hook. Yarn round hook and pull up a loop through the first 2 loops on the hook. Now you have 3 loops on the hook. Repeat the yarn round hook and pull up a loop through the first 2 loops on the hook. Now you have 2 loops left on the hook. Time to finish the stitch! Yarn round hook, pull through both loops and you’re done.
Thanks again for joining me as we become more confident and competent with various crochet techniques. Please like and subscribe to my YouTube channel too!
Just a reminder, you can see the video version of this blog post here.
There’s a new video on my YouTube channel showing how to begin a foundation chain. I’m a left hander but I learned to crochet right handed so all of these tutorials are right handed. I tried to provide enough background information so that you not only can begin a crochet project but you can understand what you’re doing as you learn. I was disheartened by a lot of tutorials that relied on a lot of assumed knowledge in their videos. As an absolute beginner I was so lost and I quickly gave up relying on video tutorials. I had to first study the basics before watching seasoned crocheters try to remember what it’s like to be a beginner.
My first video was a bit dodgy because I’m nervous. I keep doing that thing where my mind tells me I’m doing everything wrong and I psyche myself out. I’ll try to film the second video today. Until then, here’s the link to the first video: https://youtu.be/58f4hh0LGMw
The basics
1. Make a slip knot
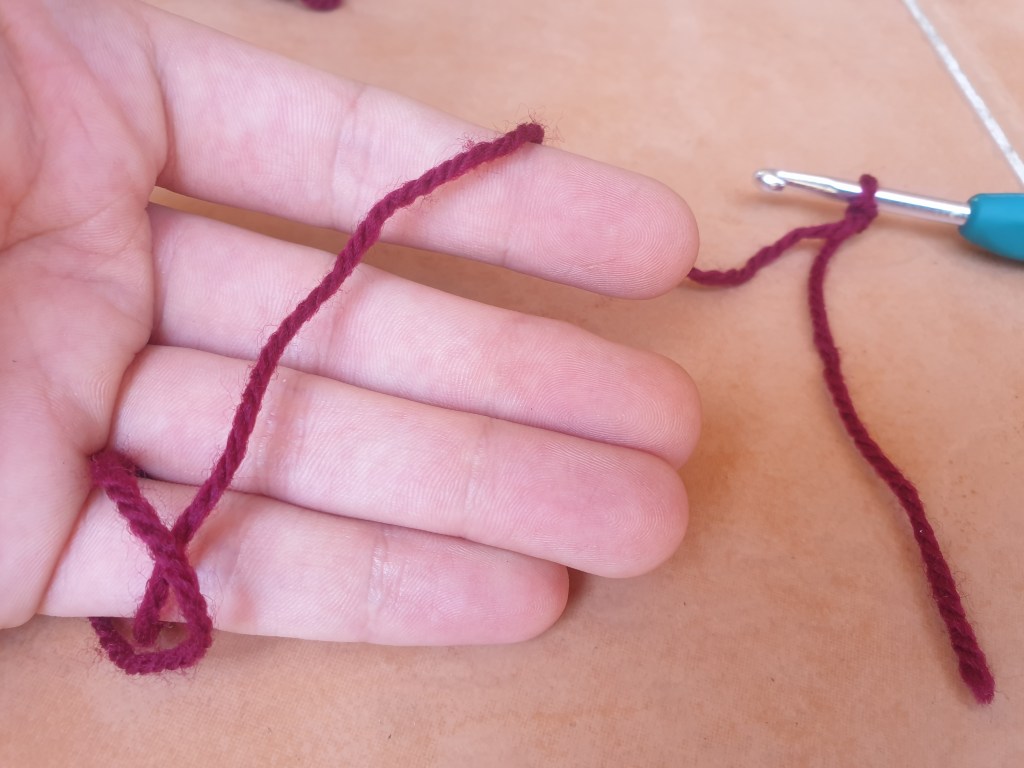
The easiest way to do it is with your crochet hook in your hand. Wrap the yarn around your fingers and pull the yarn from the ball through the loop you made around your fingers.
2. Holding the yarn
Keeping the tension is important if you want even sized stitches. Wrap the yarn around your pinky and then around your forefinger of the non dominant hand.
Wrap the yarn around your fingers to keep an even tension
Using your thumb and middle finger hold your work close to the hook to keep it steady.
Hold your work close to the hook
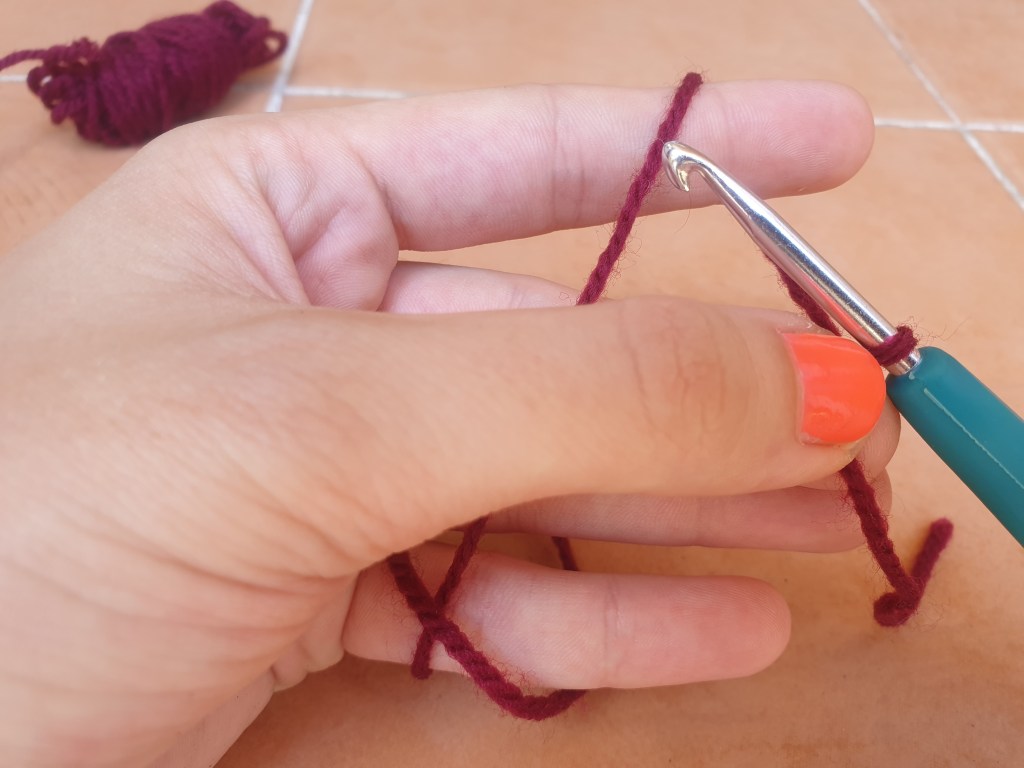
3. Yarn round hook
Wrapping the yarn around the hook in a consistent direction will produce consistent stitches. Unless otherwise stated in the pattern the yarn will always go behind the hook then wrap around and you pull it through the loop.
The yarn begins behind the hook……and wraps around so you can pull up a loop.
4. Pull up a loop
Pull the yarn through the loop on the hook.
One chain stitch is done.
One complete chain stitch.
5. Identifying parts of the chain.
Find the v-shaped stitches. Each v is a chain stitch as viewed from the top. There are 3 parts to a chain stitch and you can use the different parts to create certain edges at the beginning of the work. Just remember to always crochet into the same part of the chain stitch the entire way through otherwise the chain will end up bumpy and uneven. Also remember the loop on the hook isn’t a stitch yet. Your chains are the stitches next to that loop on the hook.
3 chain stitches and a slip knot that has been pulled tight.
Note that the initial slip knot does not count as a stitch in crochet. Pull this knot tight and don’t work into it. (This can get confusing for knitters as knitted work always uses the slip knot as a stitch!)
Thanks so much for reading, as always. I’ll be uploading the next video tonight so you can learn how to crochet into a row. Pretty please like this and subscribe to my YouTube channel queeenvk (with 3 e’s.)
Crochet has always intrigued me. People can be so creative with all those knots and loops of yarn. I wanted to learn the skill of creating things with yarn too so at the end of 2018 I watched a YouTube video. Just any beginner How To video that came up.
The problem with learning from a video is that there was no one to correct my technique if it was wrong, or to answer any questions I had about finding the next stitch or where in the stitch to crochet into. So I got frustrated and gave up for the time being.
Next I asked a family member to help me learn to crochet. We began with the foundation chain. Well, that confused me a lot because I couldn’t understand why we were starting with this straight line of chains. I guess I wasn’t asking the right questions at the time!
I walked away a bit frustrated and confused. Now, this is usual for me when trying to learn a new skill. I get discouraged and stop trying for a bit. Then I pick it up again and eventually get the gist after looking at more resources and/or actually just practicing.
I turned to the pages of the crochet magazines I had excitedly bought from the local newsagent. There in the back of each mag is a How-to section for beginners. I also read some crochet blogs and tips online. Eventually I did get the gist…
In 2019 I was diagnosed with Autism Spectrum Disorder without intellectual disability, which used to be known as Aspergers Syndrome. Now that I know I’m on the spectrum I understand why crochet and knitting is so soothing, the repetitive movements.
You may know that people with ASD will sometimes “stim” which can involve repeating a motion over and over. It’s a fantastic distraction for the mind and a very peaceful way to pass the time.
Crafternoon
When you get home from work do you go on autopilot and turn on the TV or Netflix? I replaced my TV viewing afternoons with craft like crochet and knitting. You could say it’s a crafternoon.
Some crochet patterns involve counting and concentration which makes it very difficult to pay attention to the plot of a show. I find that a podcast or music without words are a good background for crafternoons. Or even just the sounds of the neighborhood around me, particularly when beginning a long foundation chain and I need to focus on counting!
Don’t get me wrong, I still watch TV shows and movies, just a lot less these days. I’m still a beginner so I look at my work a lot. Once you become autonomous with a skill you can go by muscle memory, but I still need to find which is the next stitch to crochet into!
Plastic free materials
I’ve been sourcing yarn for my crochet and knitting that is plastic free. Think about all of the microplastics created from the fluff of synthetic materials. When I found out that every time I wash my synthetic clothing I release up to around a million particles of plastic into the ocean I freaked. Have a look at this article about it if you’re interested: The contribution of washing processes of synthetic clothes to microplastic pollution
I feel a lot of empathy, I always have, so the thought of destroying the wildlife with the choices I make in my day to day life hurts. But also… Think of all the plastic filling the stomachs of all the seafood you’re eating…
You can reduce the plastic fibres going down the drain by capturing them in a bag such as the Guppy bag. That’s the one I use. It’s like a giant delicates bag for my Black Milk Clothing collection. Hehehe..
At the end of 2019 I began my vegan journey. I have changed my purchasing habits to avoid animal products and other unethical products.
Before last Christmas I found a beautiful scrubbie yarn in 100% cotton. It makes great body scrubbers so I made a bunch for my family and gave them as gifts at Christmas. I hope the cotton scrubbies replace the plastic loofah in their shower. The recommendation is to replace your plastic shower loofah every 3 weeks. That’s a lot of plastic! I recently switched to a linen scrubber I found online so I just use my cotton scrubbie for travelling.
It’s not absolute perfection but it does the job!
Last week I found, at the bottom of my yarn stash, another ball of the scrubbie yarn! I can’t find it online anymore, I can’t remember what it was called. 😫
Anyway, I started making more body scrubbies and created an online store to sell them. Click the button below to visit the store. ⬇️
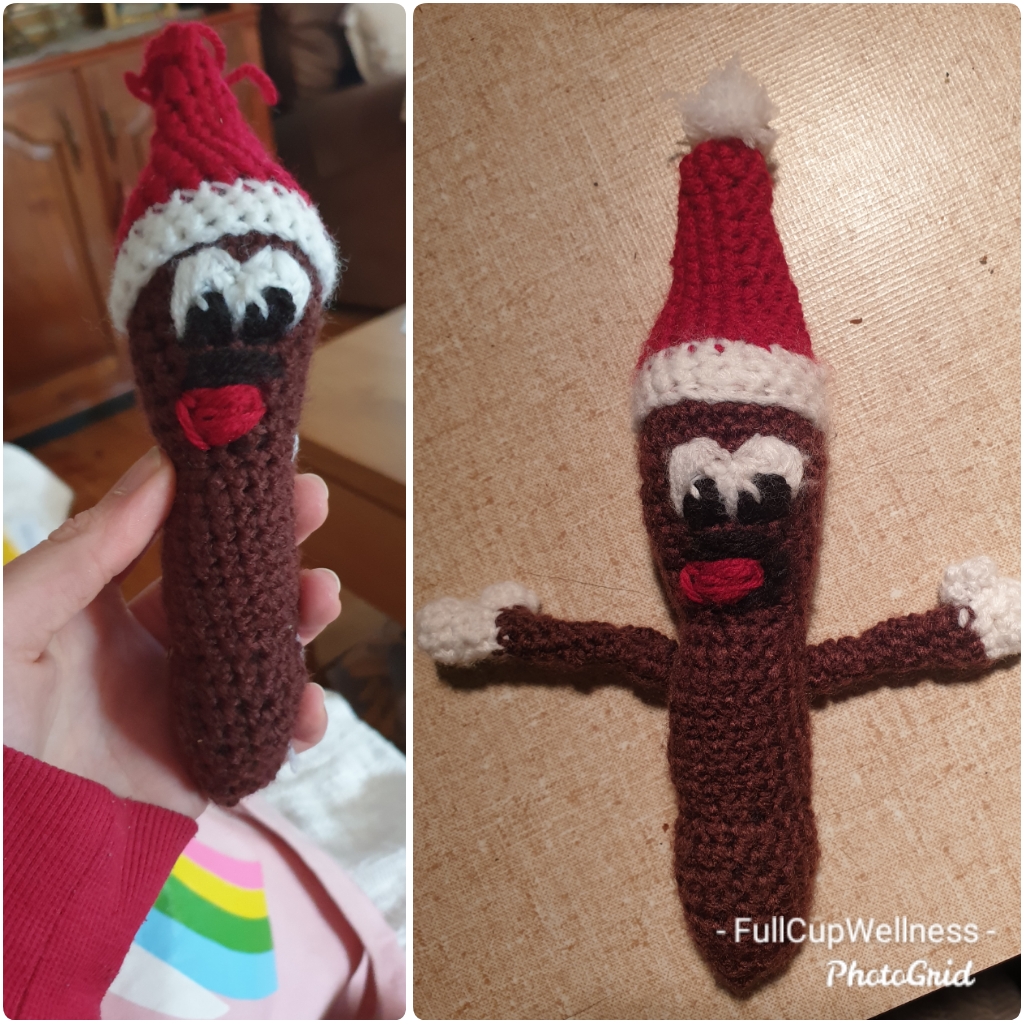
I also started making amigurumi for adults. (Amigurumi is crocheted toys) I found a free pattern on a blog with the best name ever, I wish I thought of it. I present the link to the Mr Hanky crochet pattern on the blog named…
I’ve got one complete Mr Hanky item for sale on the Storenvy site but I can whip up another in a few days. I’m also thinking of scaling it up to make a bigger novelty toy.
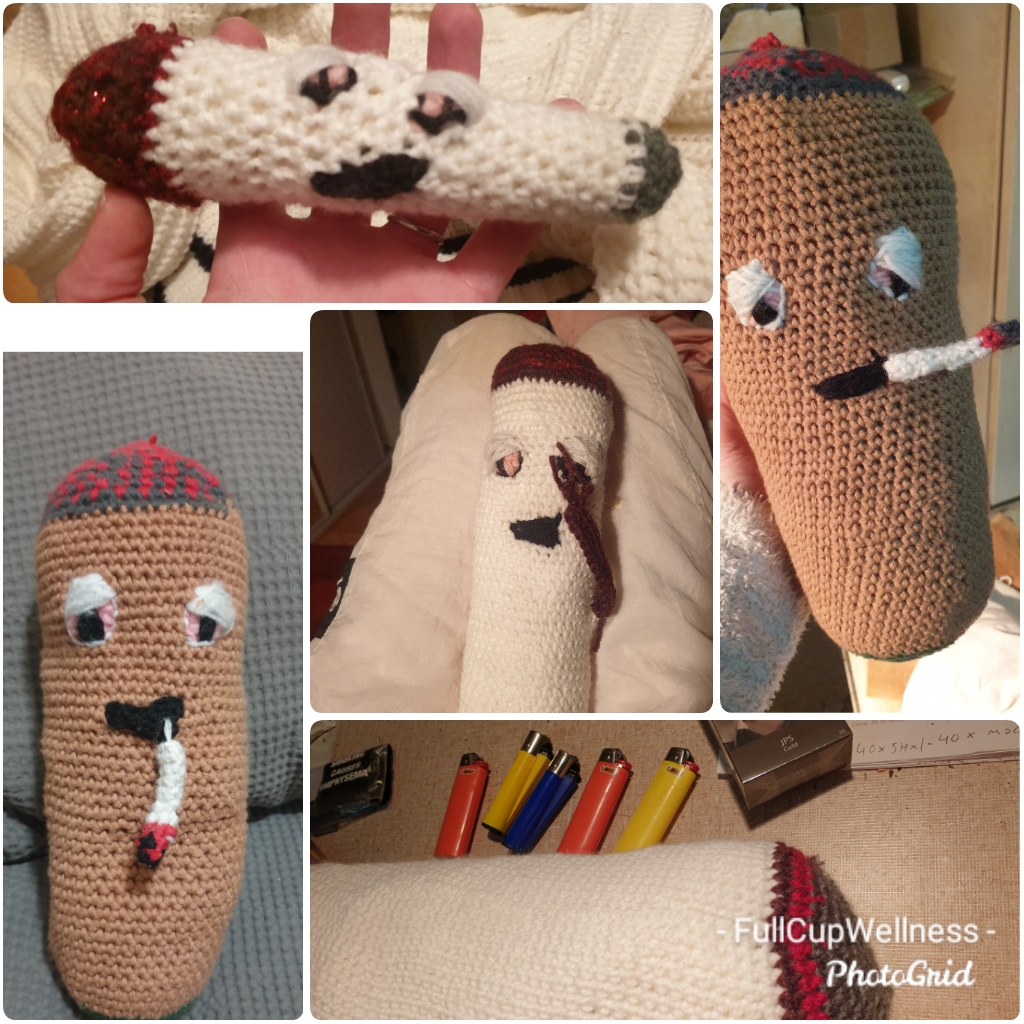
The other adult themed amigurumi I’ve made have sold faster than I’ve been making them, so they aren’t listed on my store. See some pics below..
Some real beginner work
I hope you enjoyed reading about my journey. Please let me know if you want me to attempt to make you a custom item. I’m getting the hang of freestyling the shapes and patterns, I think!
Email me: fullcupwellness1@gmail.com
Update: I found an old photo of the scrubbie yarn I used! The dark yarn in the background is the navy blue shade of the same scrubbie yarn.